For this week’s assignment I had to use a laser cutter in order to create a product. I decided to start by doing research about interesting shapes for maps made with such technology and I got inspired by the following products that I found online:
Read MoreFive imperfect necklace holders
This week’s assignment consist of repetition: Fabricating “5 of the same”. The ideation process started with a quick benchmark research of simple projects for beginners in the treatment of wood, because since the assignment was announced in the class I knew I wanted to work with that material. I also knew I wanted to create something useful and that I could hopefully give away to my friends.
Read MoreFinal Project ideation | ICM and Pcomp
Concept: Physical Visualization of violence against women.
Compare two different data sets using human interaction to define the product of the digital (or physical) visualization:
Attitude towards violence: The percentage of women who agree that a husband/partner is justified in beating his wife/partner under certain circumstances.
Prevalence of violence in the lifetime: The percentage of women who have experienced physical and/or sexual violence from an intimate partner at some time in their life.
Steps:
Define dataset: Data set
Choose a Visualization Paradigm (consider p5 vs d3 or combine both?)
Design a meaningful interaction between the human, the data and the 3d elements of the visualization.
Normalized Cubes: Stop Motion Animation
The assignment for the first animation class was to create a 30 seconds stop motion animation. As a team we discussed about what kind of materials we wanted to use in order to tell a story and we decided to work with clay. The storyboarding process helped us to decide which narrative elements we wanted to incorporate in our piece. As part of the scenery we decided to use electronic components in order to create a city in the background and we decided to keep the people moving in the background as a metaphor of ourselves being at ITP and not letting others to influence too much on our personality.
Read MoreWearable Flashlight
For the first week of the class I received the assignment of doing a flashlight with the only two following requirements": It has to be portable and it has to create light. As soon as I heard the word “portable” I transformed it into wearable and I started doing some research on options about how to create a flashlight that could be used in order to solve an specific problem.
While doing a benchmark research I decided to focus my ideation process on creating a necklace that produced light, I found some ideas that helped me shape the product. I also created a moodboard in order to define the use cases and the look and feel of the flashlight.

Moodboard for flashlight
The next phase of the process was to define the materials to use, I wanted my flashlight to not only generate light from the “front” but only from the sides, therefore I knew Acrylic would be the better option in order to create what I was planning. I also decided to work with “layers” of acrylic to that when the LED would be on, some light would come out from the sides but not in an homogenous way, and instead it would create a line pattern.
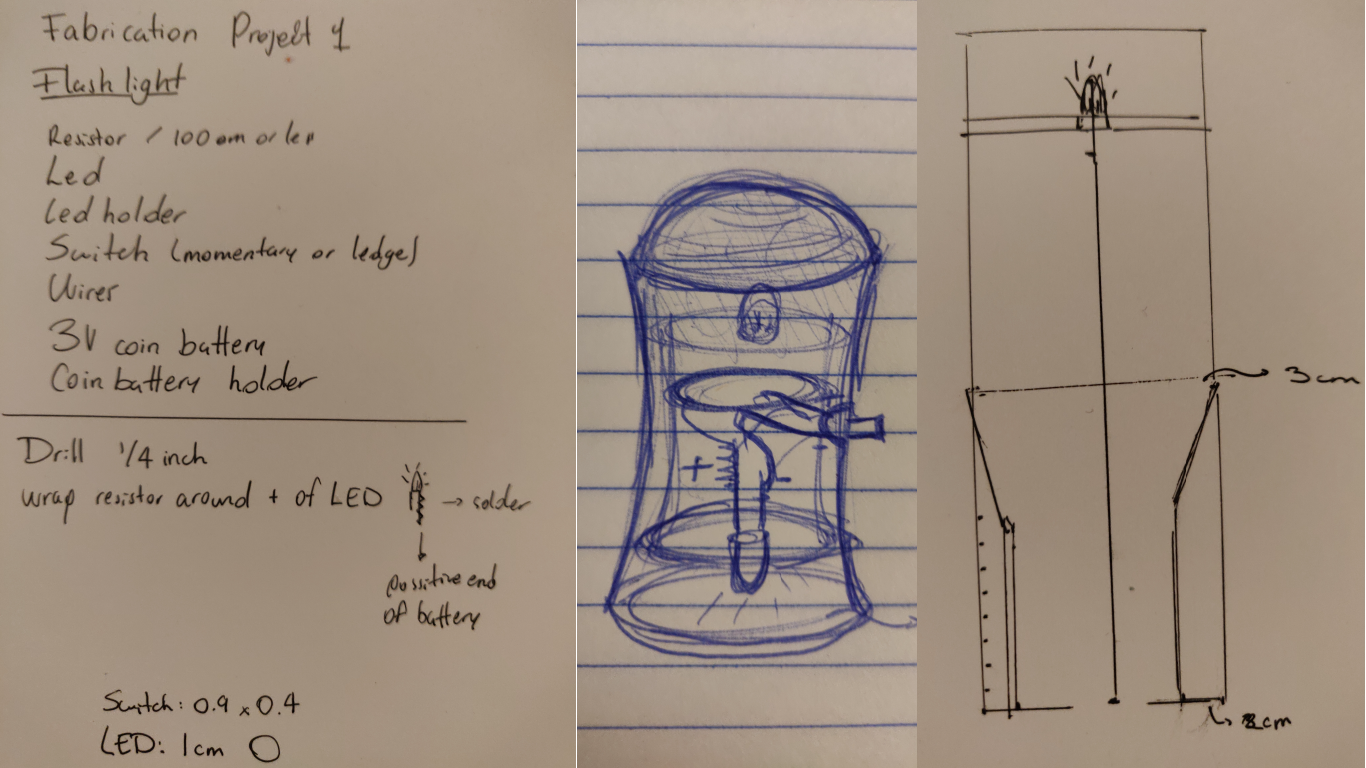
Ideation and sketching process
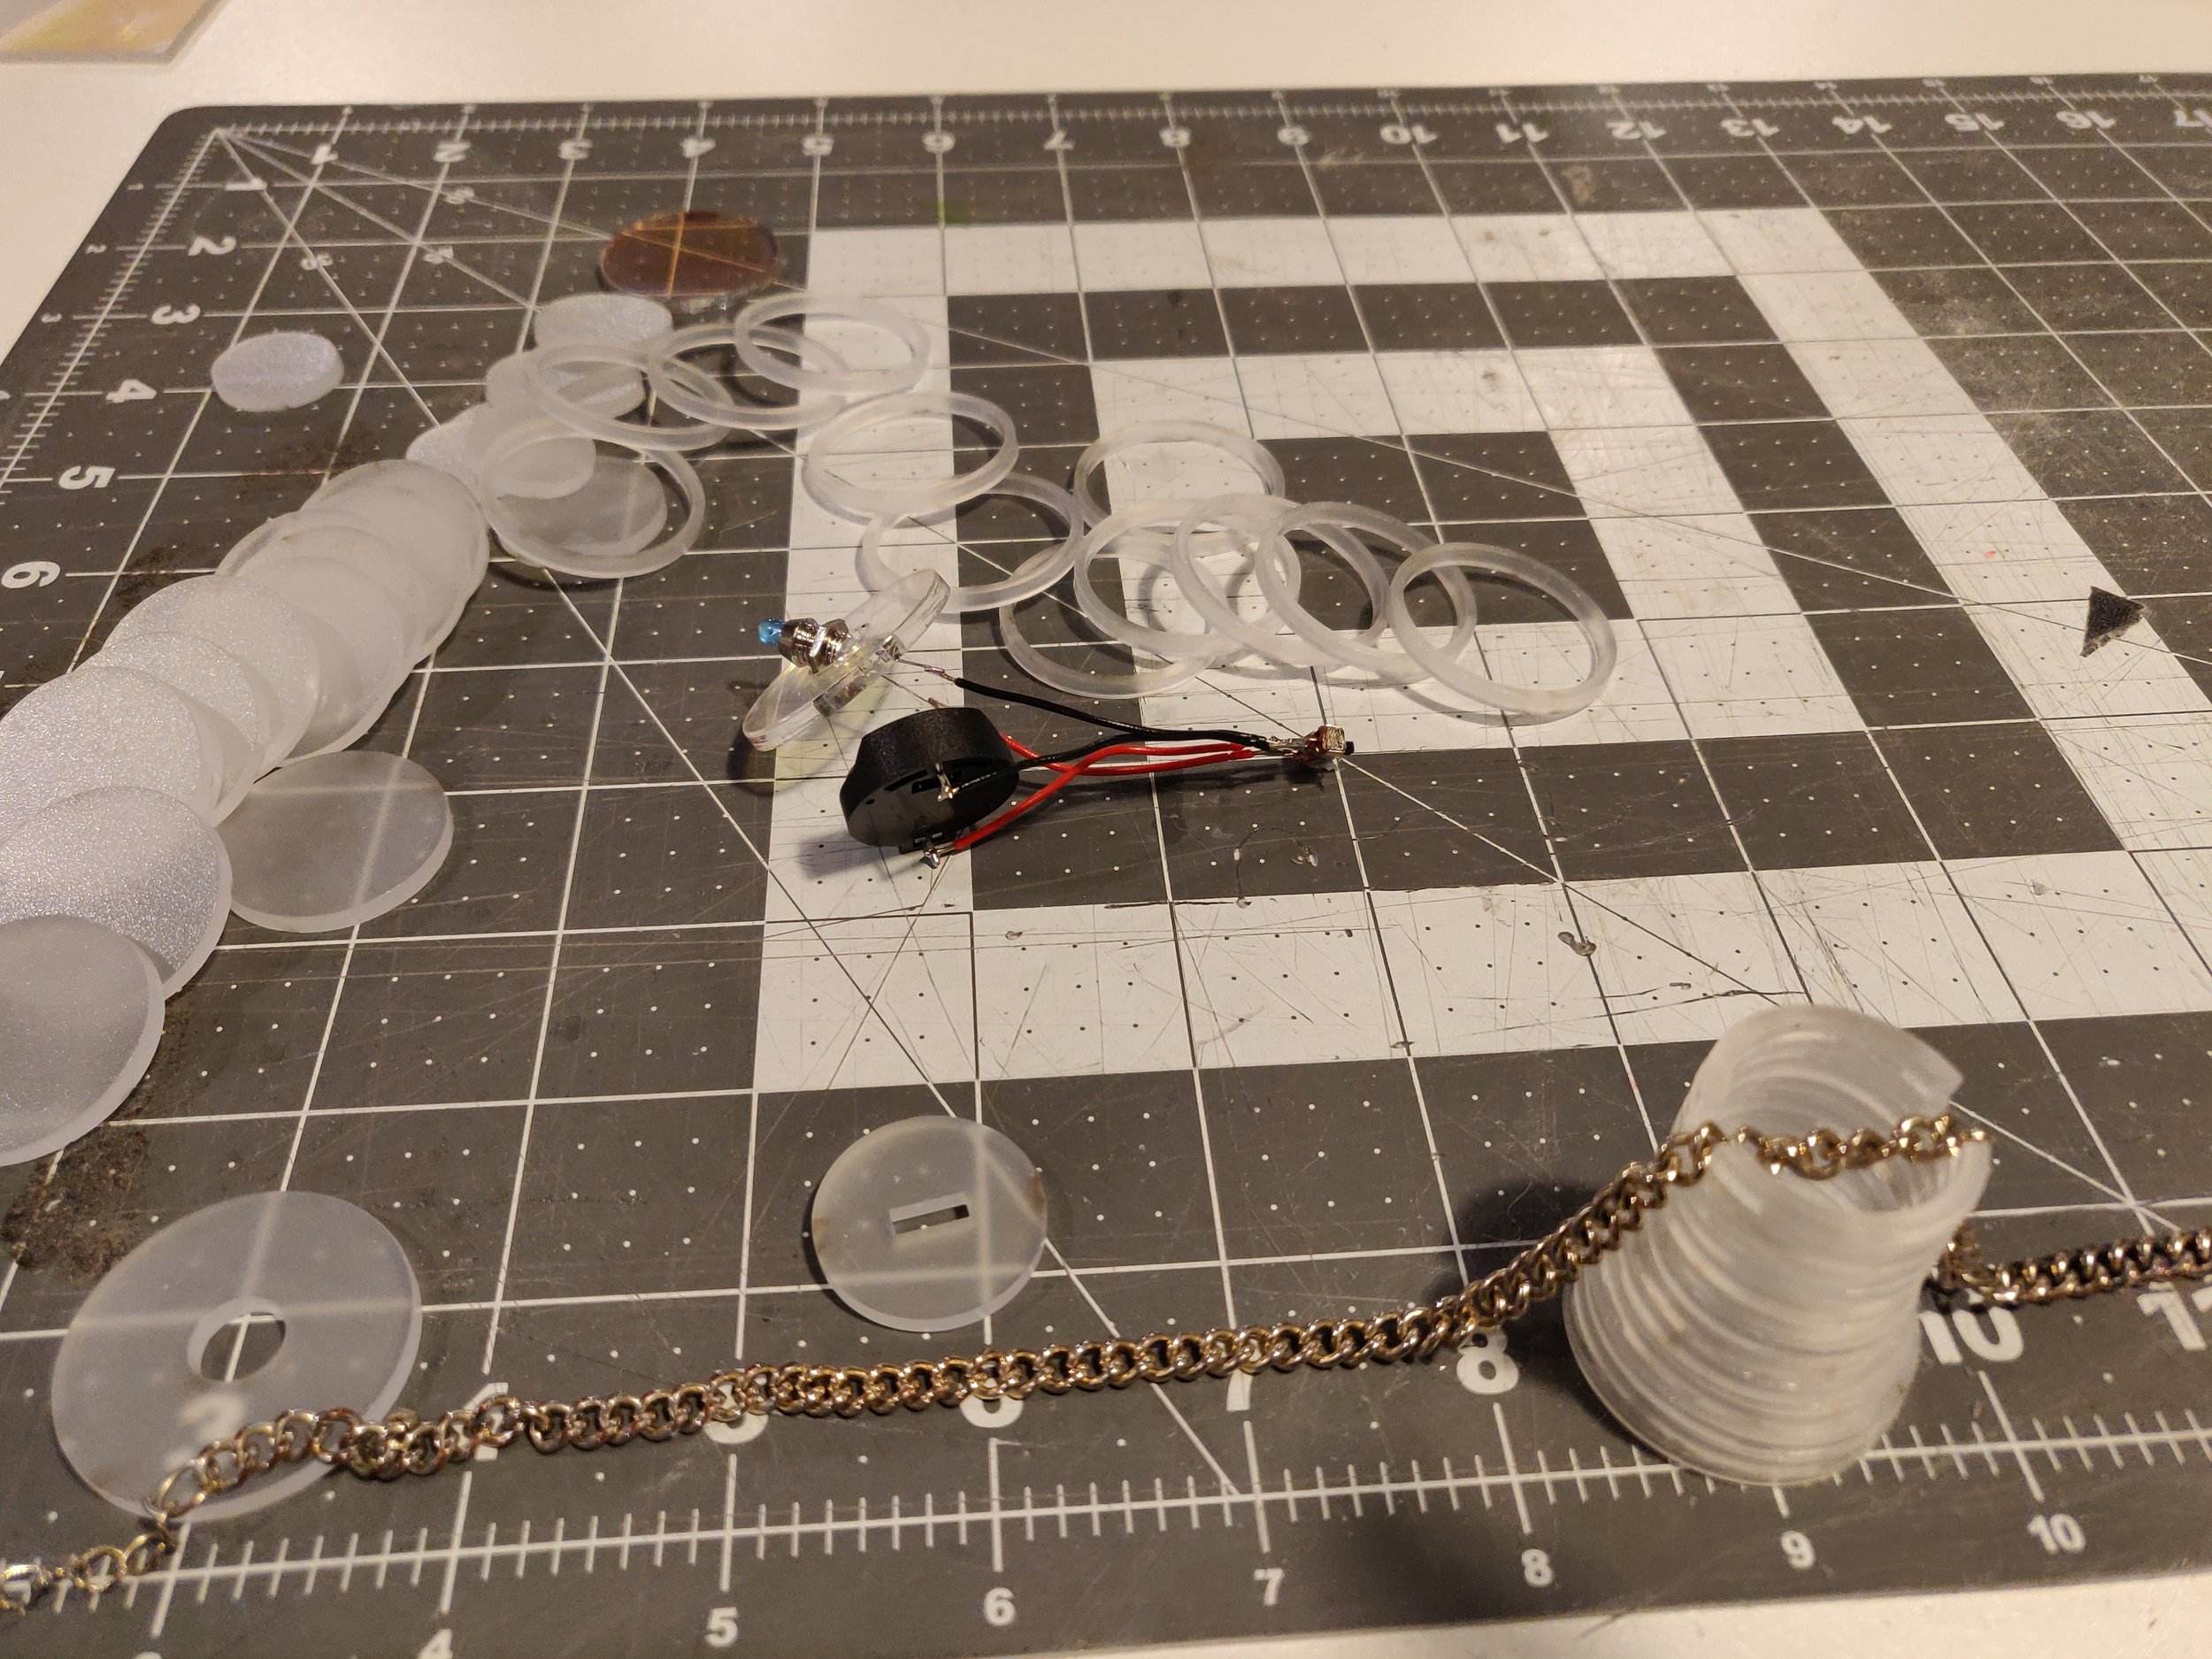
I decided to use a coin battery in order to be able to create a small flashlight that could be worn around the neck, this represented a huge challenge since I had to soldier all the components very close to each other. I use a toggle switch that decided to put in the bottom of the flashlight and a blue LED attached to an LED holder. I faced a lot of challenges while trying to make the light work due to the battery, since I have never worked with them before. The final process of the soldiering and testing looked like this.

Circuit with lighted LED controlled by toggle switch.
For the fabrication process I decided to create rings in Illustrator in order to generate a cylindric shape that would have the components inside, the button of the flashlight has a rectangular hole for inserting the toggle, also I left space for inserting a necklace from the sides and the top of the flashlight contains the light which is confined also by an internal circle piece with a hole so that the top of the LED could come out and at the end I finished with one last full circle of acrylic in a with fluorescent film on top.
I had to ensemble all the rings one by one and make sure that they were aligned and forming the desirable shape, at the same time the placement of the component represented a challenge due to the change in the diameter of the rings, therefore I had to make sure that at the end all the components would fit once I closed the flashlight.

Laser cutting the rings
Assembly of the rings with the components inside

Components inside the flashlight

Interior with exposed LED
The final result is a flashlight that can be worn as a necklace therefore the light can be generated wherever the user is. The biggest challenges of this project were trying to align the rings at the same time of keeping the components inside the cylinder and specially having to understand how to use small components in order to create a wearable device.

Final result: Flashlight
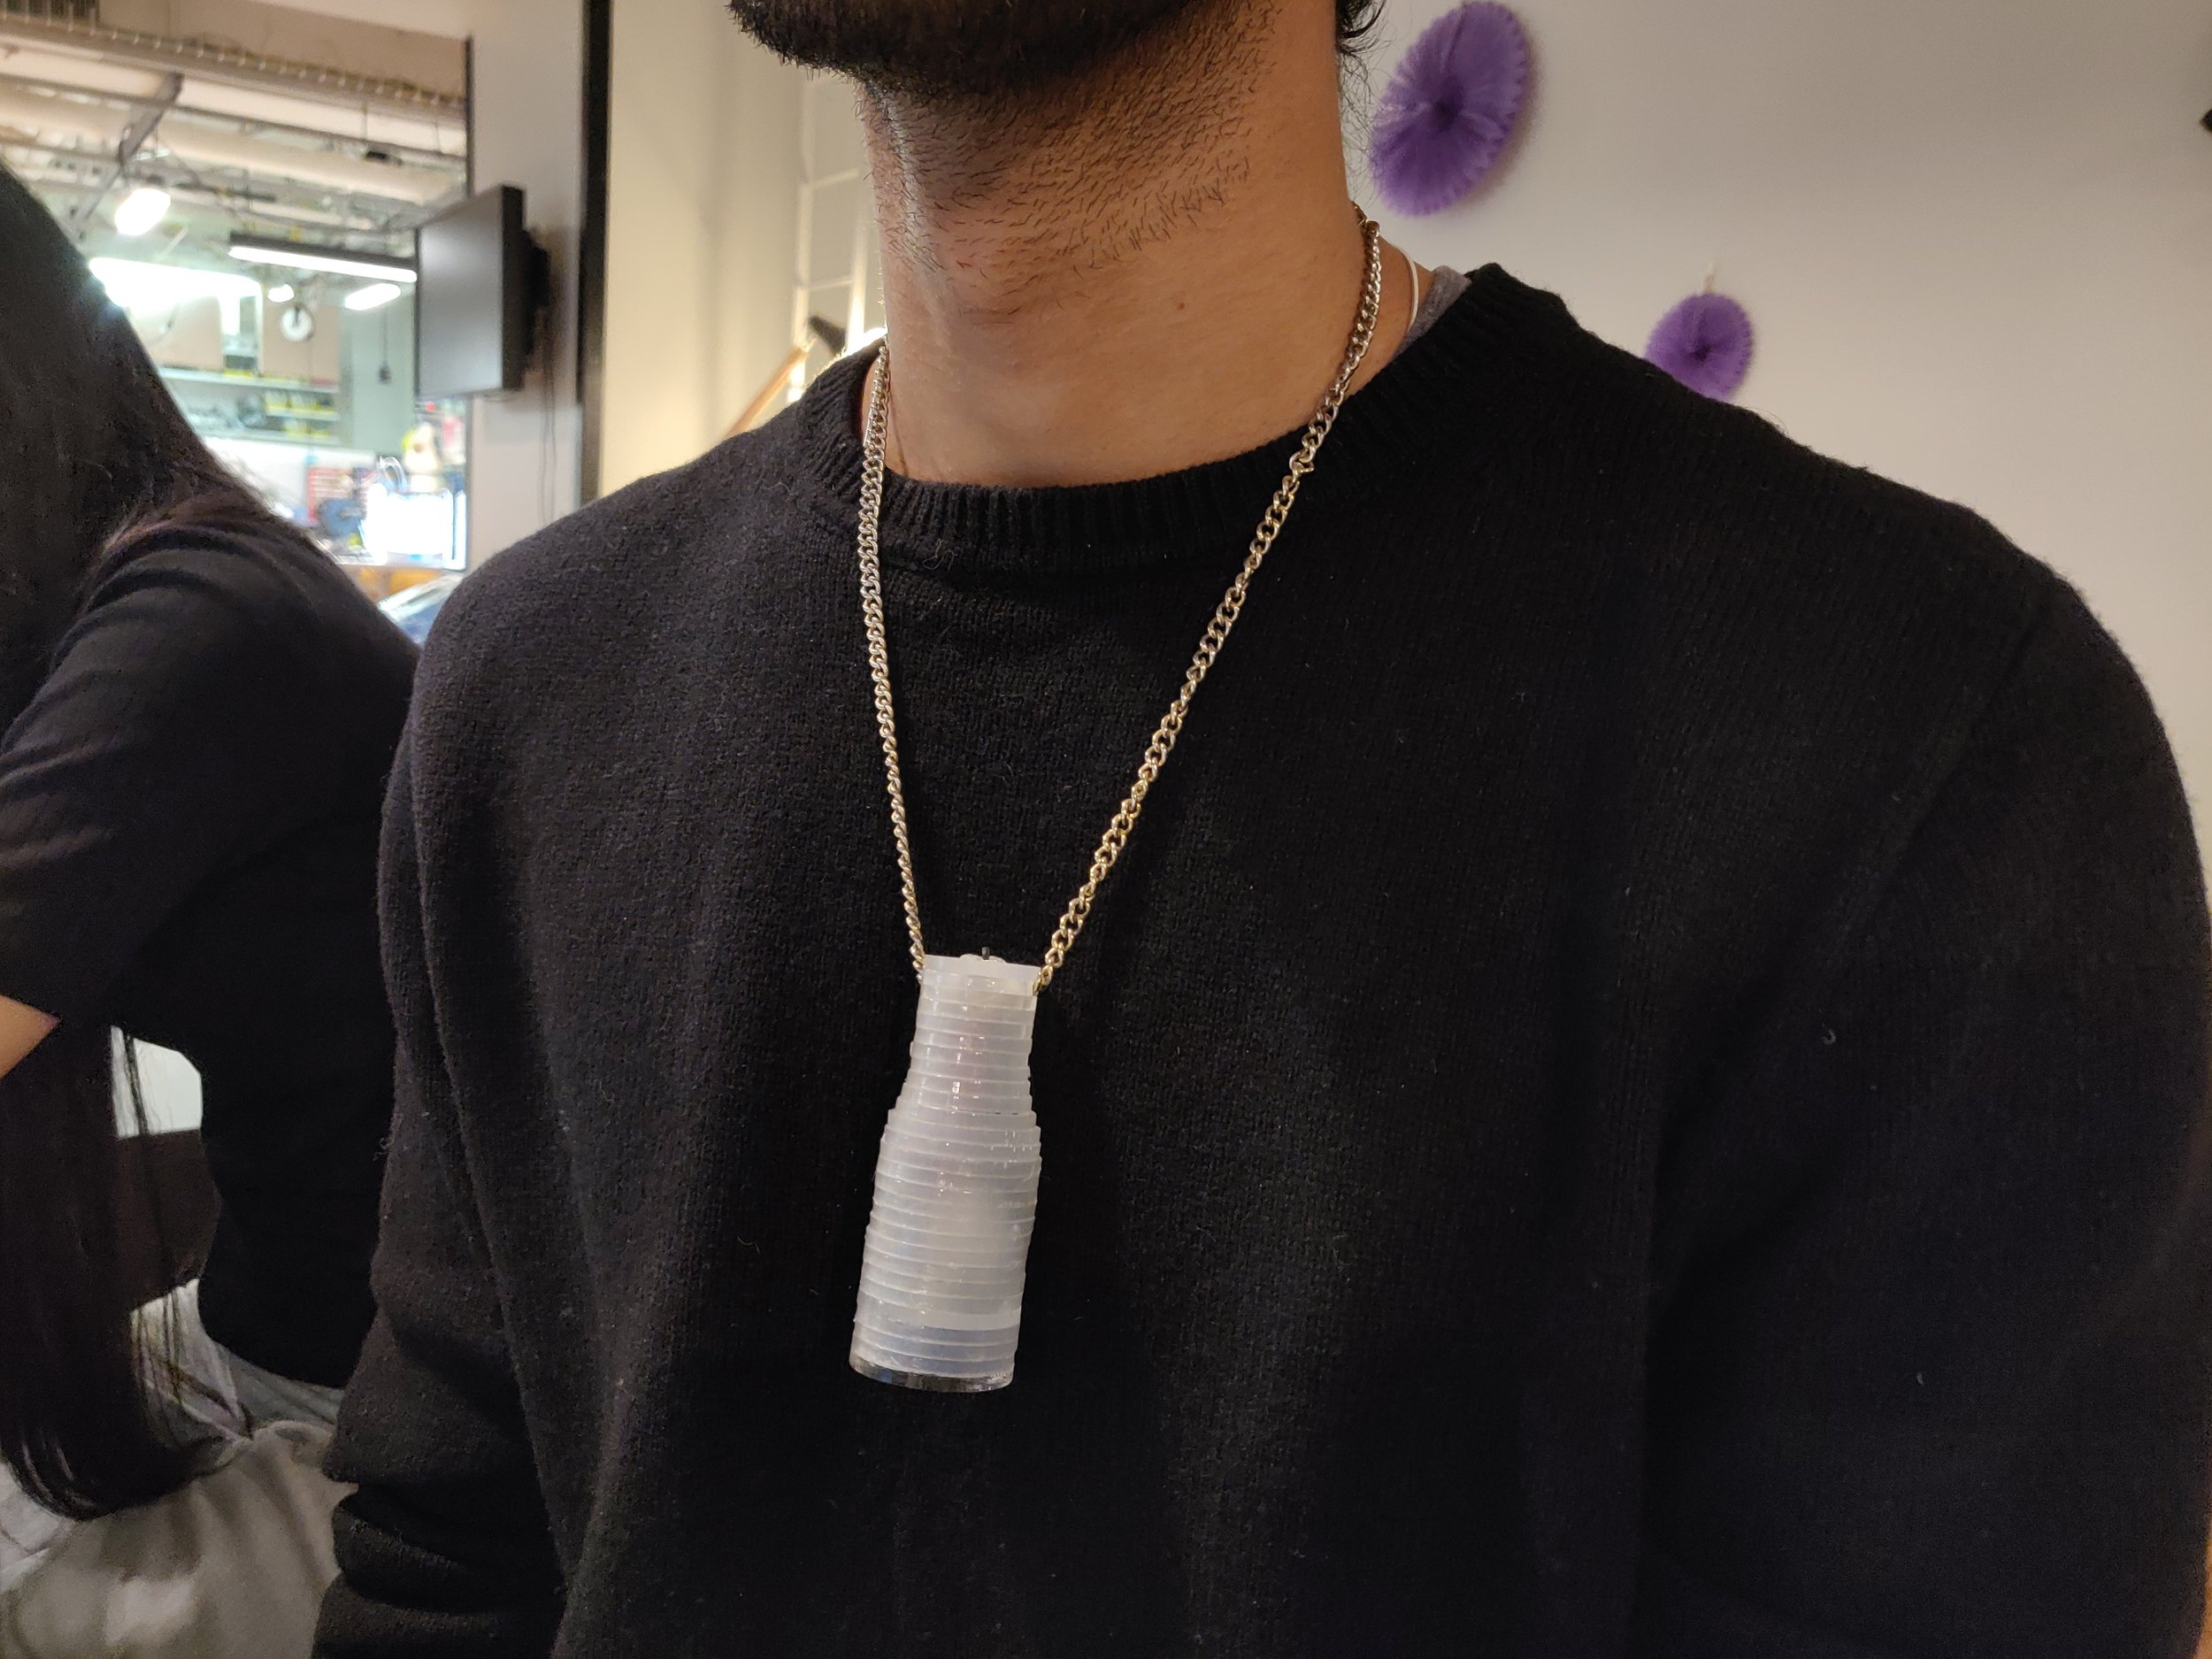
Flashlight / necklace
Dancing Waves
For this weeks project I decided to work with sound and try to connect it to a sketch that we developed in the math for p5 session with Jiwon. My start point was the following sketch:

Sin, Cos waves generation in ICM Math help session with Jiwon.
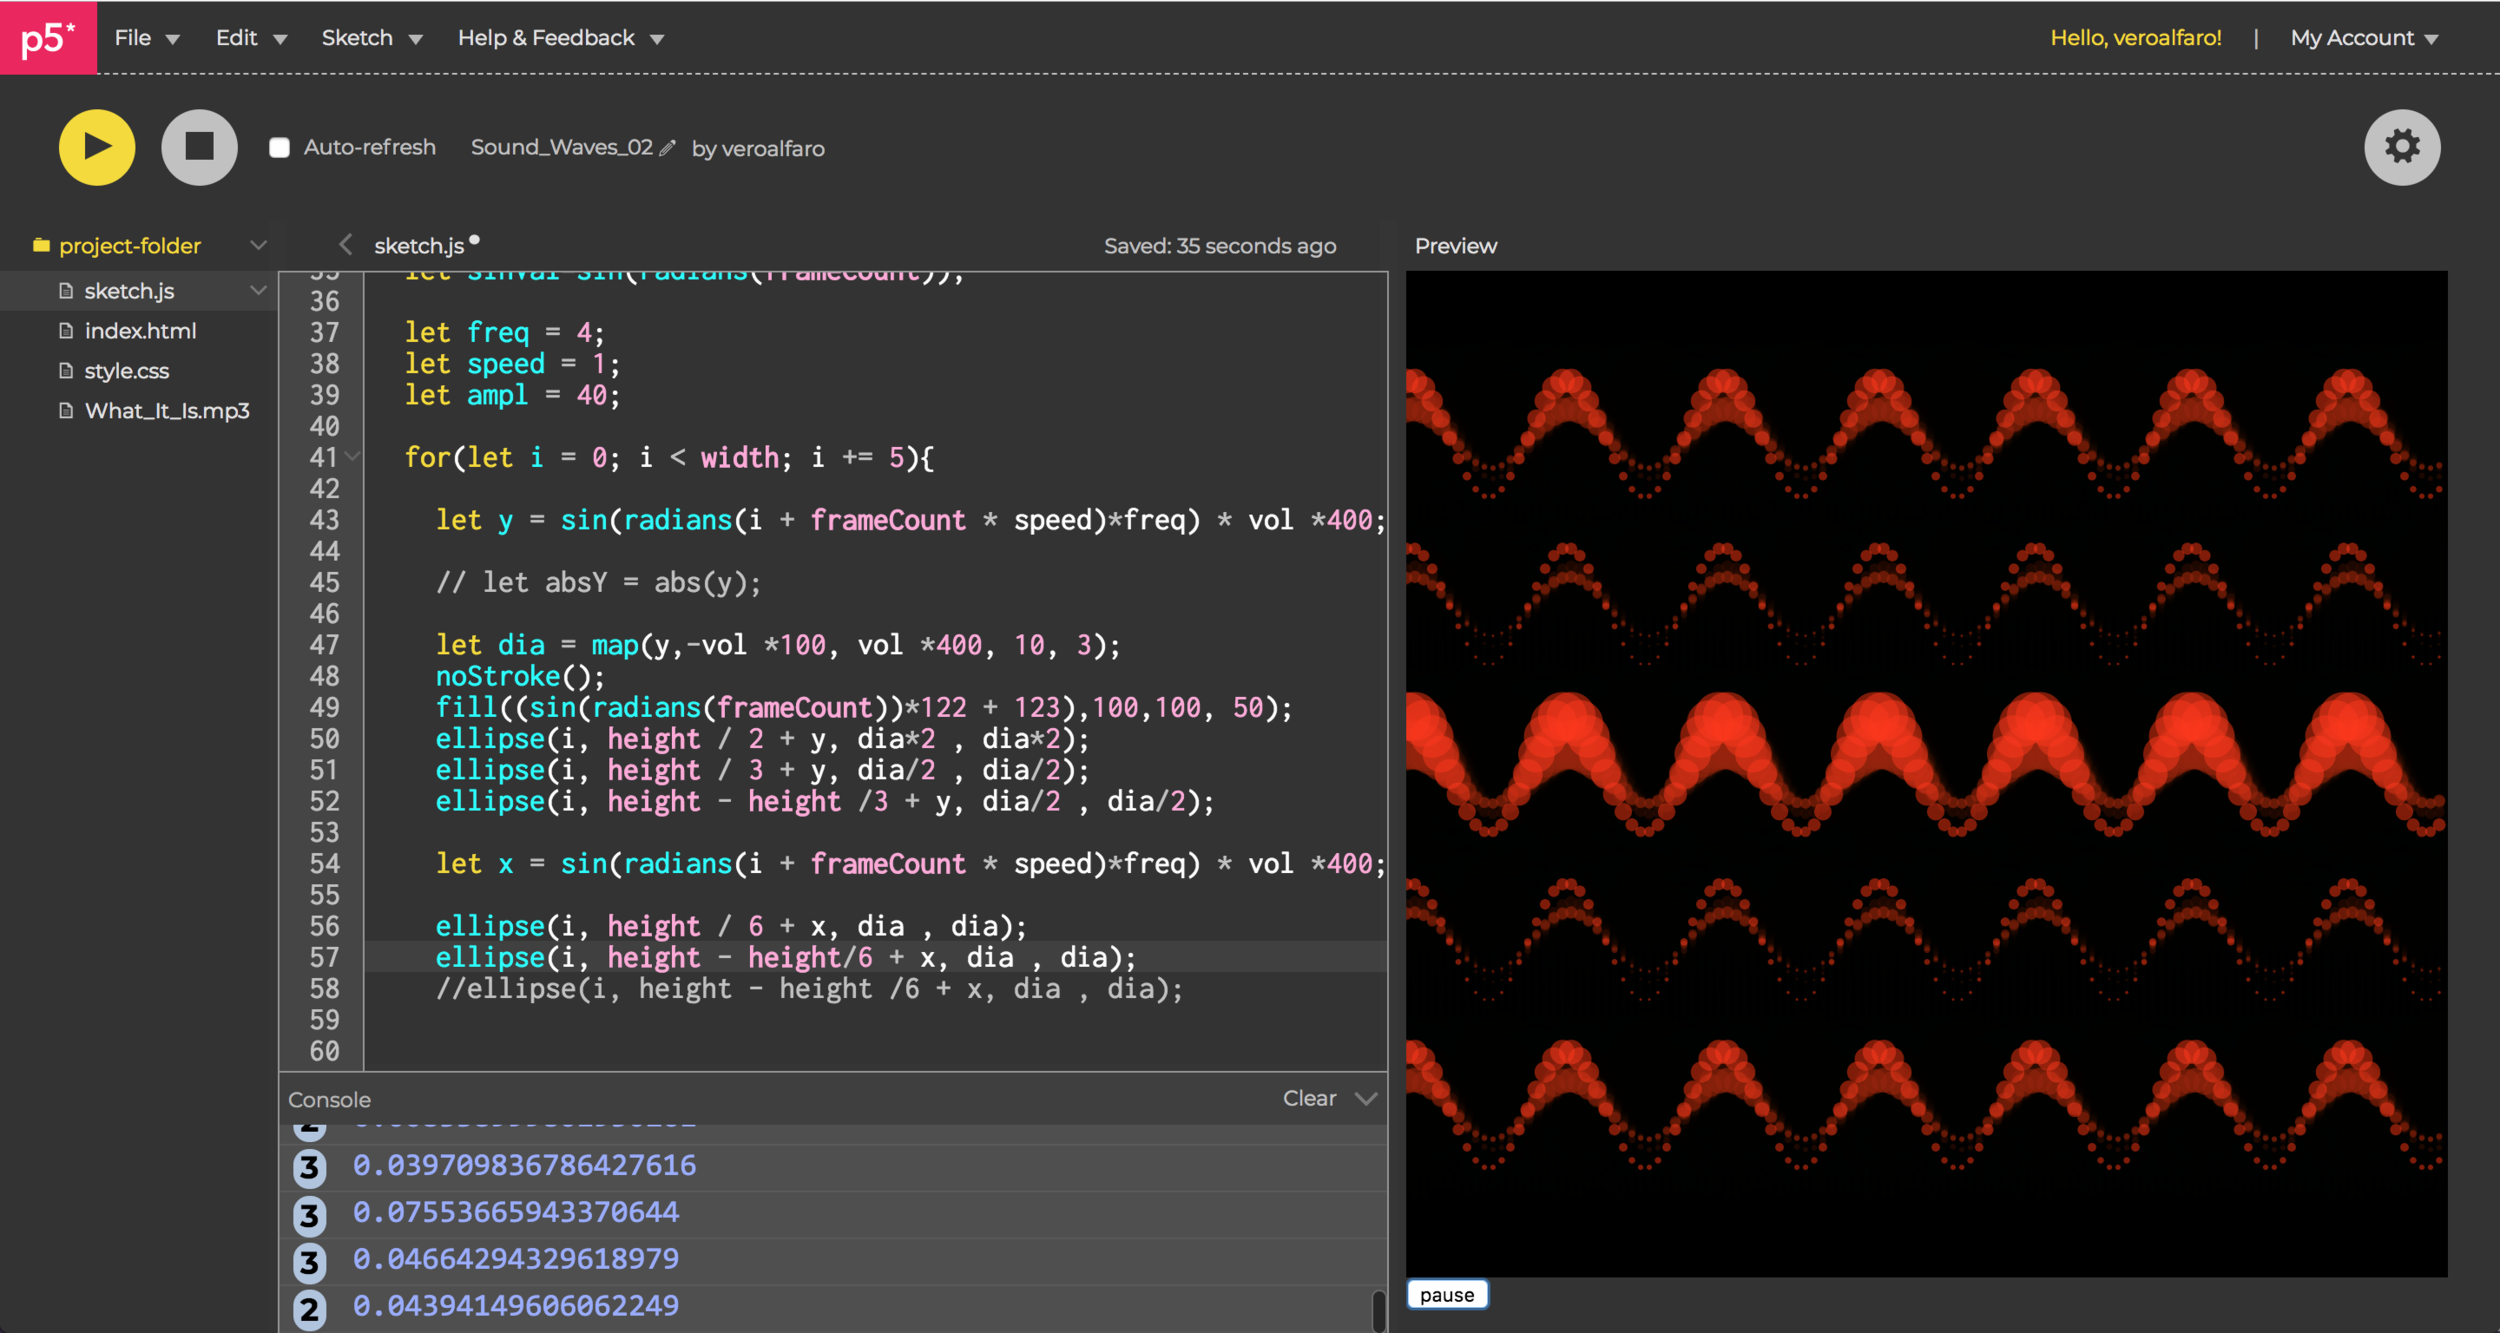
As part of my exploration I decided to create a toggle button so that I could control de audio and pause it whenever I want to. I started playing with different waves distributed in the vertical space and applying different colors and opacity in order to generate an interesting visualization.

Using the sound amplitude as an input in the waves amplitude
Once I was able to connect the audio with the amplitude of the waves I tried to incorporate more opacity in order for the ellipses to leave a trace and play with the interactivity of the sketch. The final result is a series of waves generated with the “sin” function which also change the colors according to the same function and are mapped in the y axis (the higher in y the bigger the ellipse size). The amplitude of the waves changes according to the amplitude of the sound waves which make it look like they are dancing with the music.
Final Design and distribution of waves in the space
Video and Sound: Tisch Health Services Infomercial
This is the final result of the process that I started describing in the previous post. My team and I wanted to focus on developing an infomercial that would have some kind of positive impact, therefore we decided to represent the different manifestations of stress and anxiety that are triggered while studying in Grad School at Tisch.
Read MoreWeek6: Serial communication from Arduino to P5.js
For this week’s assignments I decided to focus on the serial communication between Arduino and p5.js. I decided to implement a flex sensor that would receive the values depending on the bend angle and use those dynamic values to draw elements in the p5 canvas.
Read MoreWeek 5: Drawing with arrays
For this week’s assignment I decided to focus on understanding how to implement arrays by incorporating them into last’s week project. I decided to work with ellipses instead of lines and create a tool that enabled users to draw by creating points in the screen.
Read MoreWeek 4: Lines Mirror
The bigger challenge for this week’s project was to be able to organize the code in a Class and Method based structure. I decided to first start with some very basic element. I started with an ellipse and I was able to implement the class in the same class that we did it at school however I realized the shape was not what I wanted to use in order to generate some interesting concept for this week. Therefore I decided to start experimenting with lines.
Read More