My goal for this week was to explore the capabilities of the MIDI protocol by altering a pre generated melody. I decided to go with this approach mainly because I lack knowledge in music theory and I wanted to focus my time on the technical implementation and the design of the tangible interactions.
My original idea was to create a controller for children to manipulate some known melodies, my moving and touching different and interesting textures. I also wanted to play with the geometry of the enclosure in order to work with something different than a rectangle.
Creating melodies with MIDI
Sketching and ideation
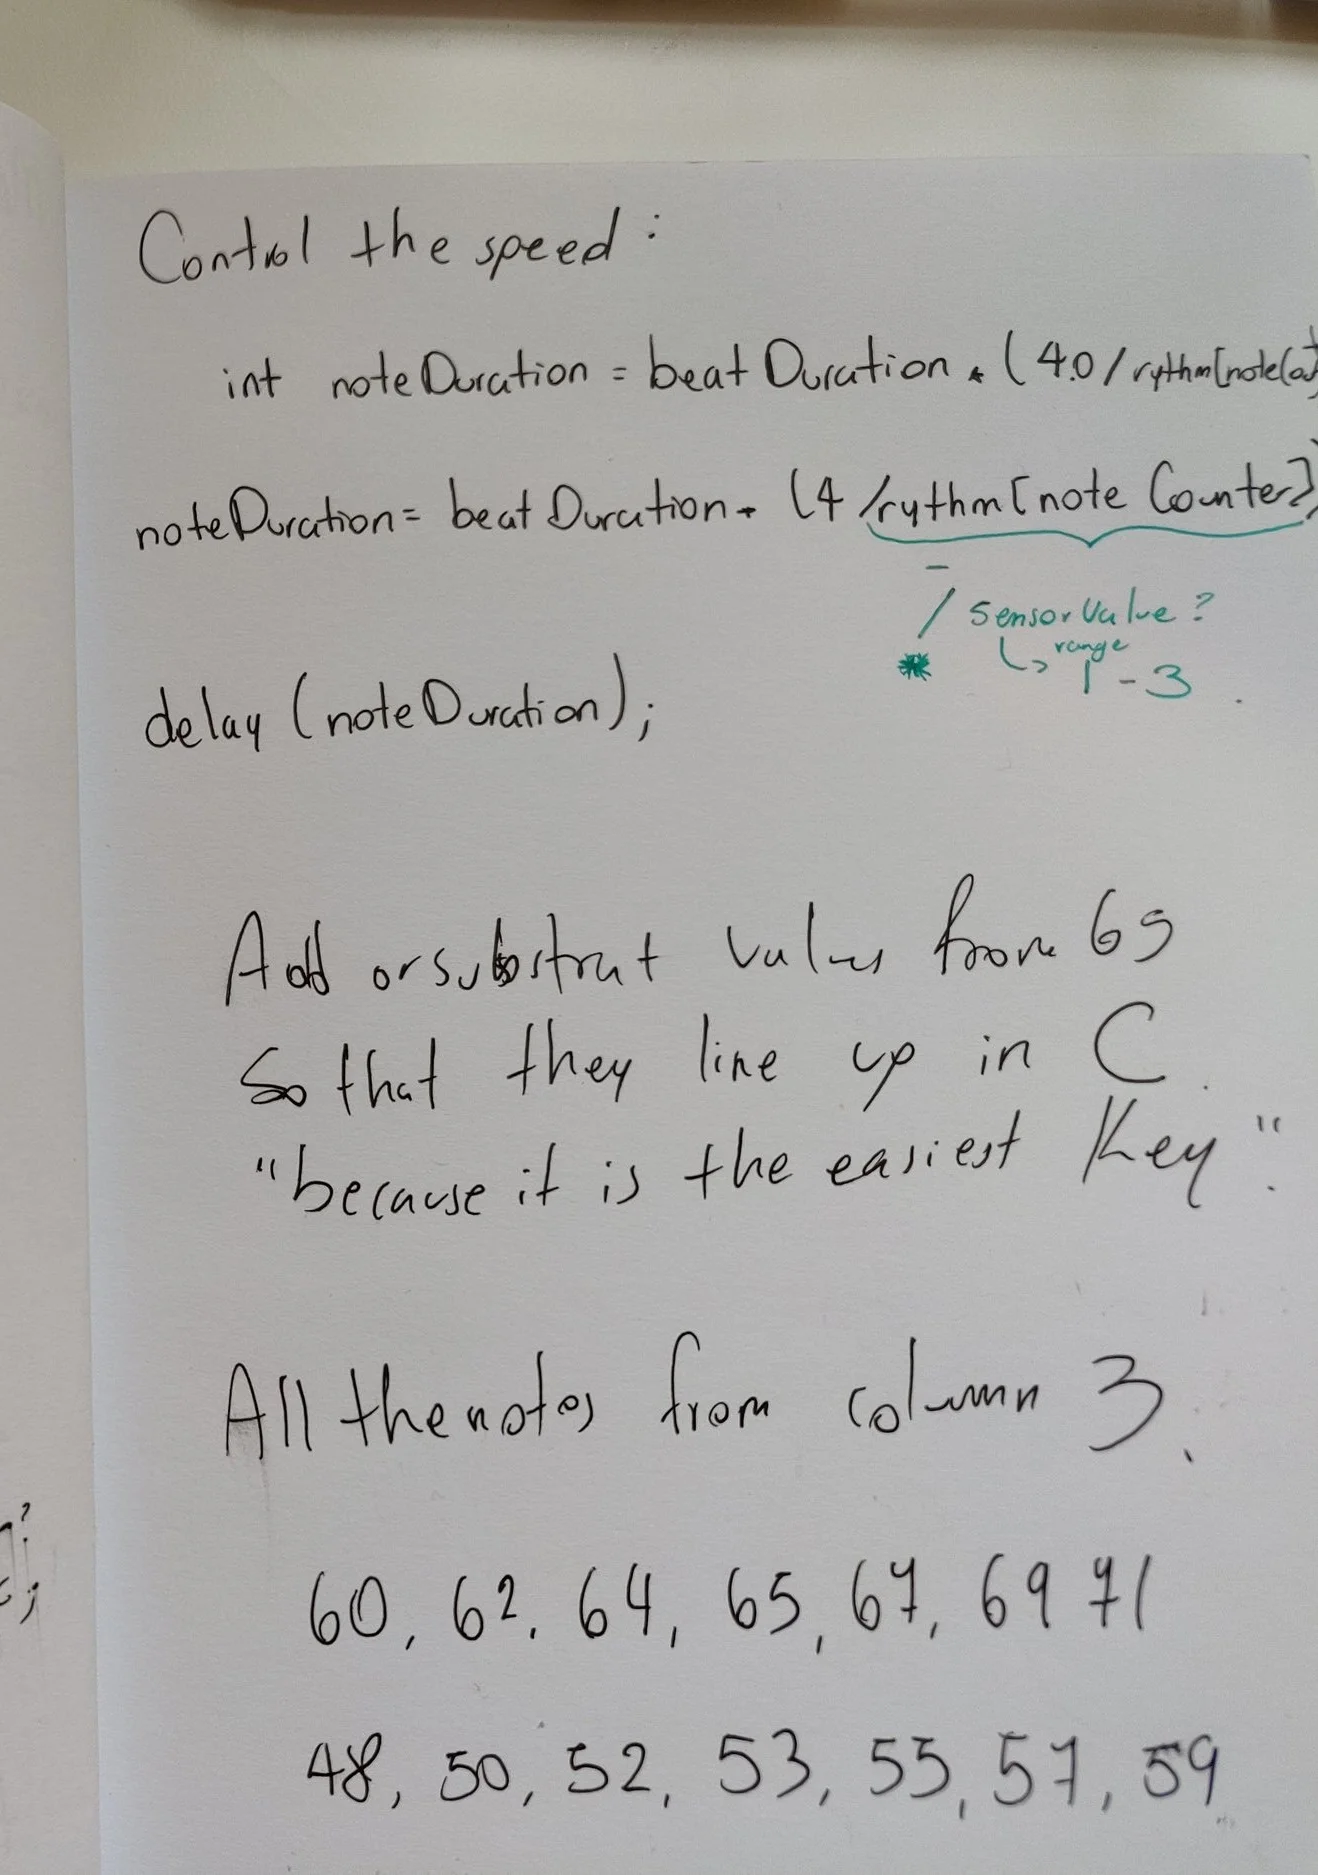
The next phase was to start adding the flex sensors, the potentiometer and the toggle button in order to start testing the code and creating the logic for the components to alter the music output was being generated. The base model was to have a simple melody playing from randomly chosen notes from an array, the toggle button would play a different array (one octave higher or lower).
I decided to use the potentiometer as a volume control and I mapped the two flex sensors to change the speed in which the notes were playing and the pitch bend correspondingly. I also decided to include two LEDs with different color to indicate the active octave that is being played according to the toggle selection.

Sensors and components
In terms of design I decided to create a proof of concept for the children’s original idea that I had, specially because I decided to work with a randomly generated melody instead of working with popular children melodies, however the concept that I decided to prototype could be (potentially) scaled to work as an instrument to teach kids how to manipulate sound and its different components.
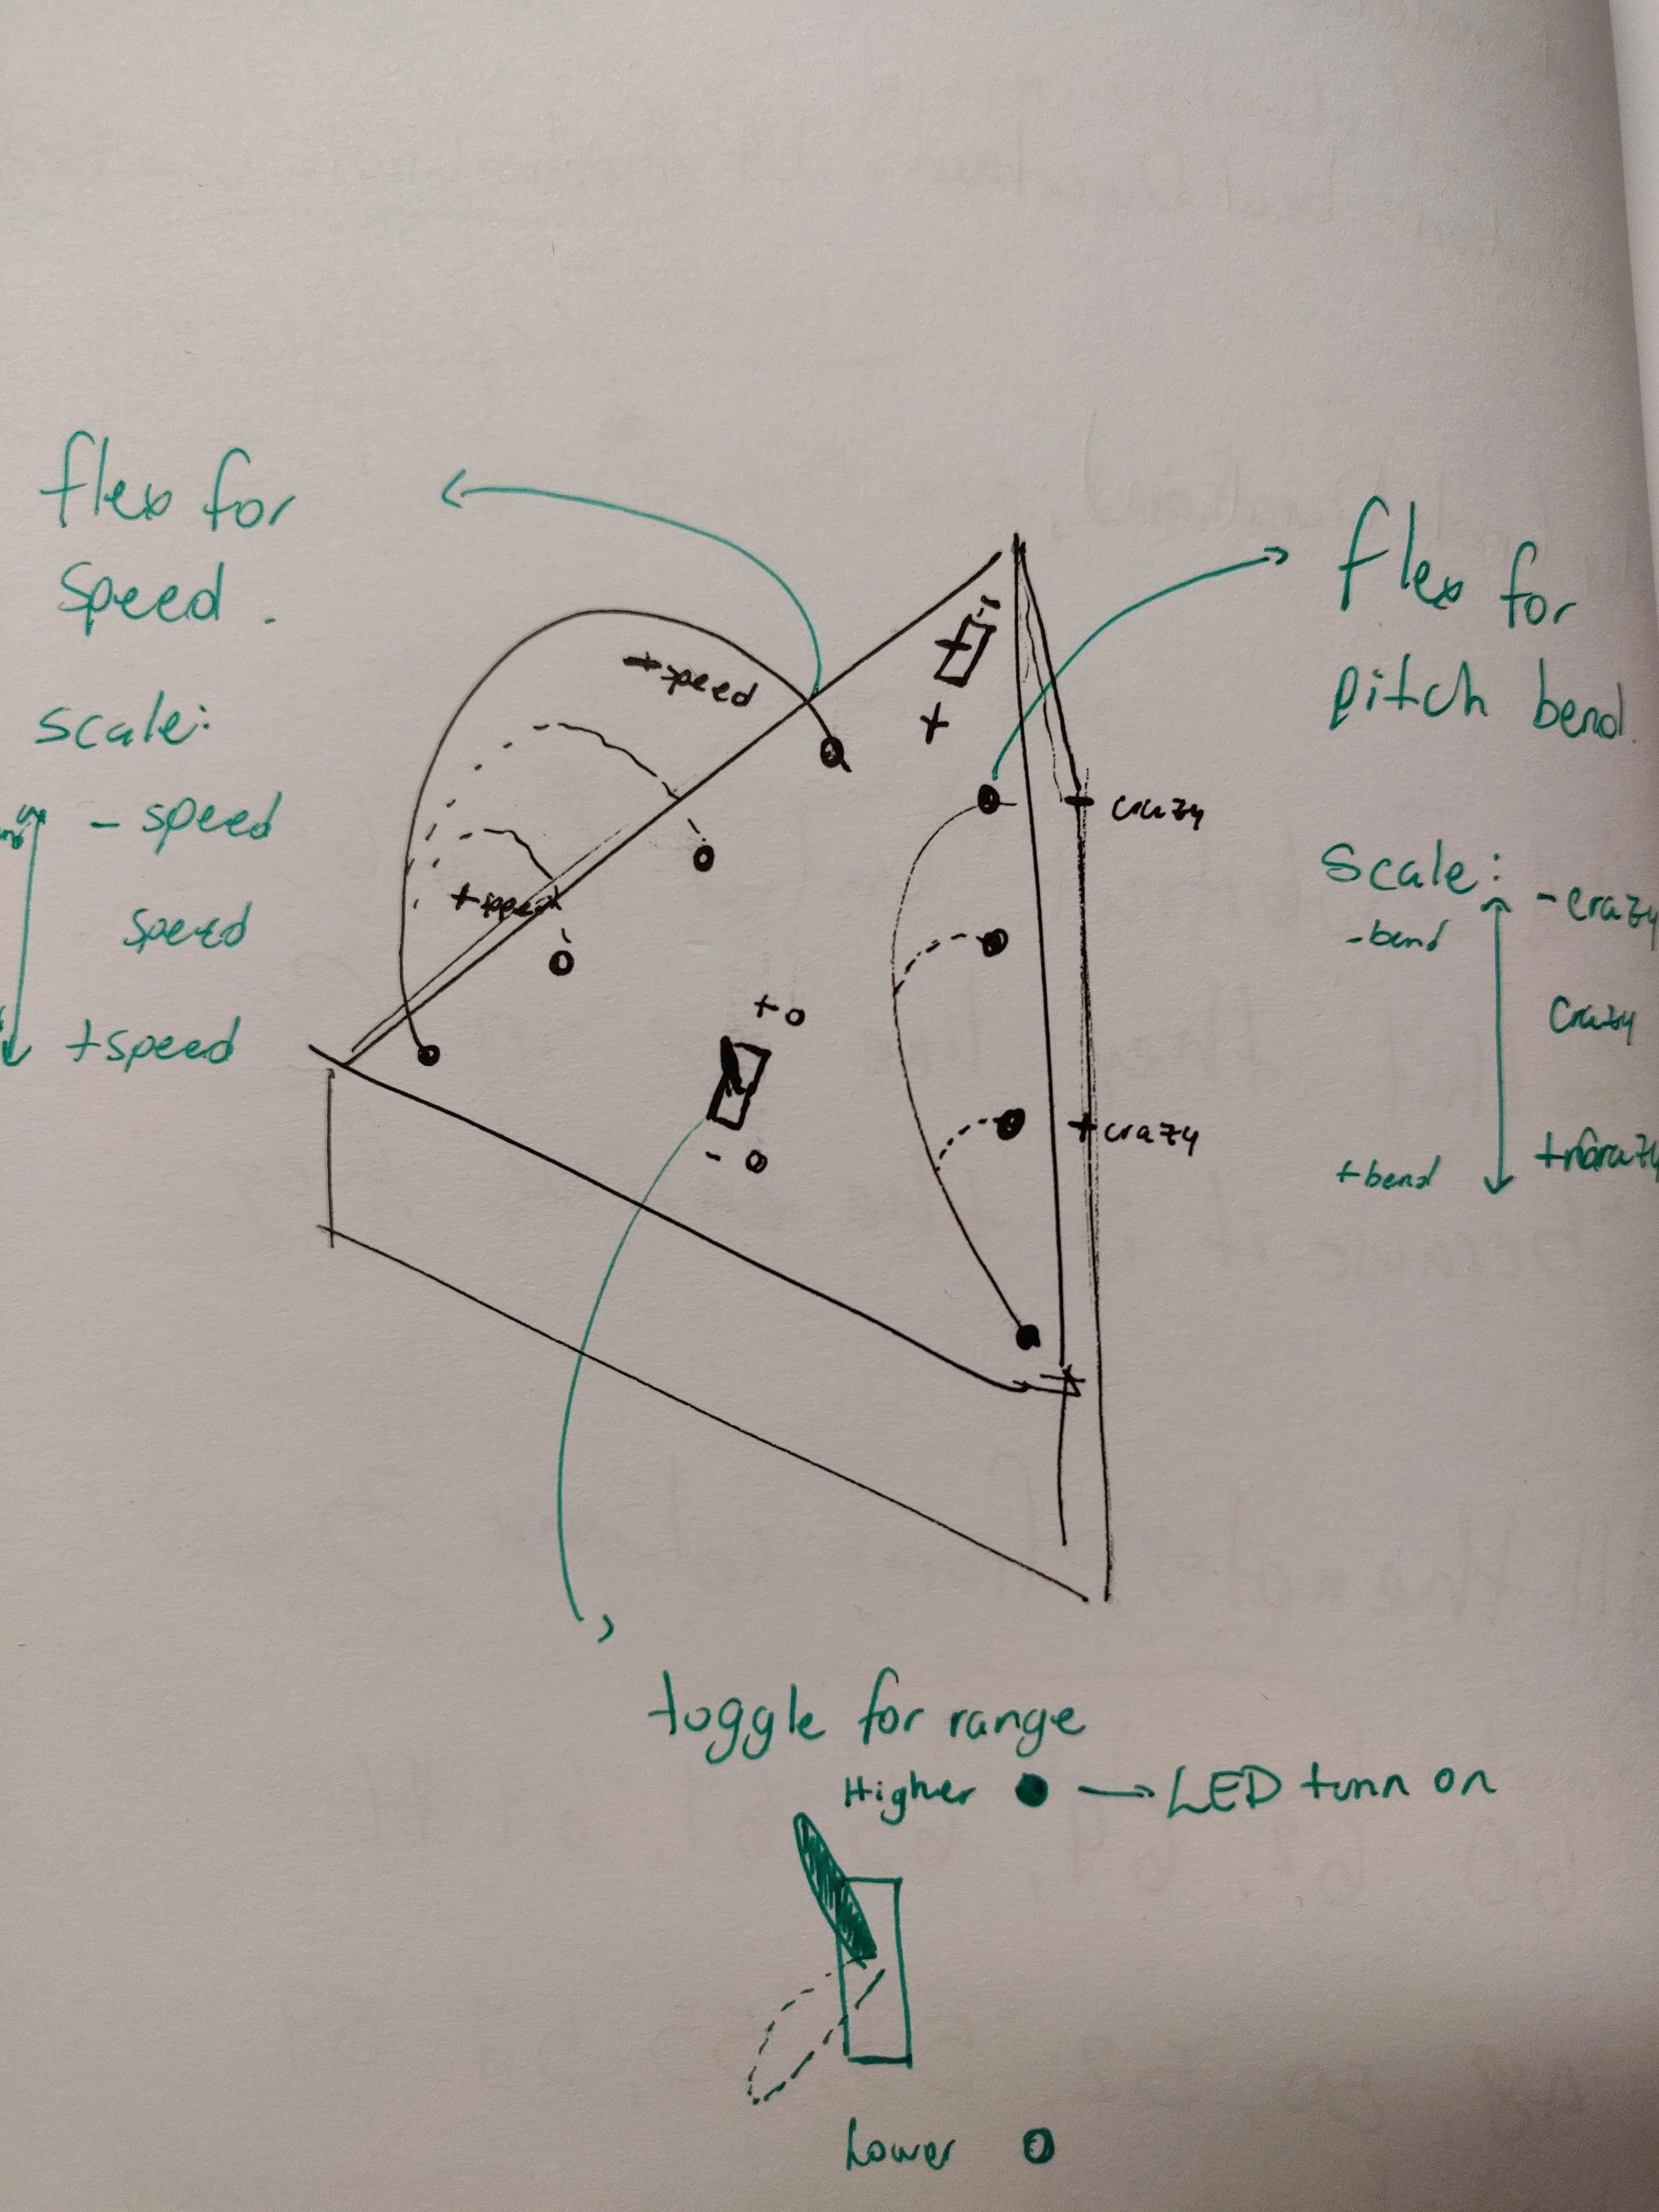
As for now, it is an instrument capable of changing the speed, bend the pitch, change the volume and switching between two octaves, in a triangular shape.


The user has the option of changing the bend of the blue and black strips by plugging them in different holes, each one has a label with a word that indicates the transformation that is being done to the melody. For example the blue strip changes the speed, therefore if it is attached to the further hole, the speed is “slow” and it increments as the tip gets closer to the fixed end of the strip, the user can decide if they want to play the melody “slow”, “med” or “fast”. The visual indication of the musical transformation directly related to the hole was important to be able to teach the user how to interact with the instrument.
The same happens with the LEDs that light up according to the movement of the toggle, which also contains text labels indicating “High” and “Low” for the octaves (array of notes) that are being played. Lastly I included arrows as visual indicators of the rotation of the volume potentiometer so that it would work as a positive reinforcement of the mental model that the users already have regarding volume controls.